Home Improvement

How to Complete a Kitchen Remodel on a Budget

Kitchen Remodel Richmond VA can be as simple as a cosmetic refresh or as involved as a total gut. Regardless, the timeline will depend on the scope and objectives of the project.

Fabricating countertops, altering a room’s footprint and changing or adding electrical wiring or plumbing will add time to the process. Permits are also required for some work, and may require additional wait times.

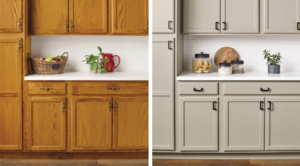
Cabinets are a major part of your kitchen and have a significant impact on its overall design. They provide ample storage space, help establish a focal point in the room, and can add a great deal to your home’s value.

The cost of cabinetry accounts for 30% to 40% of your remodel budget, making it one of the biggest decisions you’ll make. That’s why it’s so important to weigh the options carefully and avoid impulsive splurges that may not add value in the long run.

New cabinetry is available in a wide range of styles, materials, and finishes. For example, a slab cabinet is simple and affordable but can be transformed with unique paint colors or hardware. A shaker cabinet, on the other hand, offers a more traditional look and can be elevated with a modern finish.

Custom cabinets are a great option for homeowners who want to take control of the design process and create a truly unique kitchen. They’re more expensive than stock or semi-custom cabinetry, however.

If you’re not ready for a complete overhaul, a less-expensive upgrade option is to replace the cabinet doors and drawer fronts. This can drastically change the appearance of the kitchen without requiring any major construction. Additionally, it’s a green alternative as less material goes into landfills.

Countertops

Countertops are one of the most noticeable features in your kitchen and can dramatically affect your overall kitchen design. Whether your old countertops are damaged or just plain outdated, upgrading to new and stylish materials adds both functionality and aesthetic value.

Counters are typically made from stone, tile, laminate or wood. Natural stones like granite and marble are beautiful and luxurious, but they can be quite expensive. Tiles come in a variety of colors and patterns and are very durable and inexpensive. Laminate is another affordable option that provides the look of wood or stone but is easier to clean and resists stains.

When it comes to choosing materials, consider the overall look of your kitchen and your budget. If you’re planning on selling your home soon, lower-end finishes may be more appealing to potential buyers. However, if you’re planning to stay in your home for several years, investing in higher-end materials will increase the resale value of your kitchen.

One practical upgrade to consider is a waste disposal hole in your countertop to conceal and make trash cleanup easier. This can be easily done by ordering countertops that have this feature pre-drilled or simply boring a hole into the top of your existing countertops.

When installing your new countertops, it’s a good idea to have plastic sheeting up around the house to keep dust from spreading into other areas of your home during the remodel. It’s also a good idea to have appliances in place and to have your counters professionally measured before installation so that they match perfectly. This helps to ensure that your kitchen is as functional as possible during the entire renovation process.

Appliances

The appliances are typically the largest line-item on a kitchen remodel budget and they can have the biggest impact on your new kitchen. However, not all appliances are created equal. You should always focus on choosing appliances that fit your kitchen remodel style while also being practical and functional. For example, if you are going with a modern, contemporary look you may want to choose a panel-ready refrigerator or a built-in cooktop with custom panels that match your cabinets. Similarly, you should consider energy efficiency when selecting appliances. Some appliances like dishwashers and microwaves are now available with an energy efficient option.

Having the right appliances can add value to your home and help it sell faster should you decide to move. Additionally, be sure to choose a brand of appliance that is well-known and popular for its quality and durability. Lastly, if you do opt to splurge on a higher-end appliance be sure to ask your repair man about warranty coverage. Many brands offer extended warranties for appliances that are more expensive than their counterparts.

If your current kitchen appliances are not broken or in need of immediate replacement, you can save some money by simply keeping them until the remodeling is complete. However, you will likely need to find a way to store them for the duration of your kitchen remodel. Depending on the scope of your kitchen remodel, you may need to move them to another room in the house or at least keep them as far away from the construction area as possible to avoid scratches and damage.

Lighting is not a big cost factor in most kitchens but it can be an easy way to give your kitchen a fresh, new look. Consider a mix of different lighting options including dimmable LEDs for a warm, inviting glow in the evening and recessed lights or a pendant for a focal point.

Fixtures

A kitchen remodel isn’t complete without essential fixtures like faucets, sinks and lighting. These are often easy to change and don’t require tearing out walls or ripping up floors, making them a budget-friendly way to make a big impact. Choose styles and finishes that coordinate with your new kitchen theme and design aesthetic to tie everything together.

Backsplashes are a great way to add style and personality to your kitchen. They protect the wall behind the countertops from water, grease and other icky stuff while adding visual interest. They also offer an opportunity to add a pop of color or pattern to your kitchen. Keep in mind that installing a backsplash will increase your overall project costs, particularly if you choose a material with a complex design.

Choosing a new sink and faucet can dramatically affect your kitchen’s appearance. Choose a size that suits your storage and workflow needs while factoring in maintenance and care preferences. Then, decide whether you prefer a stainless steel or granite composite material and installation type that matches your budget and style.

Upgrading to energy-efficient appliances and lighting will reduce your energy consumption while improving your home’s comfort and efficiency. Look for ENERGY STAR ratings when shopping and consider options like LED lighting that uses less electricity or tankless hot water systems that only heat water when it’s needed.

Changing your kitchen’s fixtures can add a fresh, modern feel to any home. If you’re not ready to commit to a full-scale remodel, focus on the most outdated components and replace them with modern versions. By focusing on what’s important and staying within your budget, you can enjoy your upgraded kitchen for years to come.
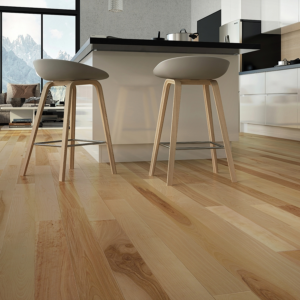
Flooring

Flooring is a significant part of any kitchen remodel. It can affect the aesthetic of your space, and it is an important decision because it has to last a long time.

The best choice for your home depends on your lifestyle, design preferences, and budget. Working with a qualified design-build general contractor team can make this decision easier and help you find the perfect product.

One popular option for flooring is hardwood. Wood can add an elegant touch to any kitchen and has a natural look that many homeowners love. However, it is not ideal for areas that experience a lot of moisture. Wood can be damaged by water, which can lead to rot or mold. To prevent this, you can use a waterproof sealer to protect your floors from moisture.

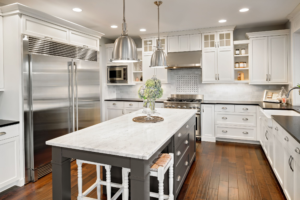
Another durable option for kitchens is tile. This material is easy to clean and comes in a variety of colors, patterns, and textures. There are also many options for tiles that mimic the appearance of other materials, including marble and travertine.

If you are going with a tile floor, it is recommended to install it after the cabinets. This is because installing it before the cabinets can cause damage to the tiles from the weight of the cabinets and other items stored on them.

Some people prefer to install the cabinets first, which can work well if you plan on making changes to your kitchen in the future. However, this method can waste the flooring material as you will have to cut around the cabinets and appliances. It can also be difficult to access plumbing or electrical wiring that may run underneath the cabinets without removing them.

Home Improvement

How to Go About Cabinet Refinishing

San Jose Cabinet Refinishing is a great option for homeowners and investors who want to update their kitchen without spending money on brand-new materials. However, it requires a serious time commitment and if not done correctly can be extremely messy.

Refinishing is also only possible if you’re happy with the style and finish of your existing cabinets. If you would like to change the style profile of your doors a refacing project is a better choice.

Paint

If you are in love with the style of your cabinets, but they are outdated, simply painting them can give them a fresh look. Repainting involves keeping all components of the existing cabinetry and changing the color without chemically stripping or extensive sanding. Most professional painters apply a coat of primer-sealer to the entire cabinet, which reduces the need for sanding and helps the new finish adhere well to the old paint. This step is optional for homeowners.

The first paint-prep step is usually filling holes, dents and dings with spackling or wood filler. This is especially important on older cabinets, which may have accumulated many tiny indentations over time. Once the spackling dries, it is best to wait 24 hours (or even several days) before you try to reattach the cabinet doors and drawers, to ensure the paint has had time to cure into an enamel-like finish.

There are a variety of applicator options for cabinet repainting, including spraying, rolling and brushing. Choosing the right one depends on how much of the cabinet surface is being painted, and your personal style of working. For example, a spray gun is great for large areas of flat-front doors, but a quality brush is better for detailed work like on routed panels and other architectural features.

While high-gloss enamel paint was once the preferred finish for kitchen cabinets, water-based finishes are now gaining in popularity because they are easy to clean and less toxic. Regardless of which type you choose, the final product should be durable and resistant to stains and water damage.

Before you decide on a specific color, experts recommend applying a sample coat of the color to a piece of poster board or an inconspicuous area on your cabinet door to test it out. This will help you to see how the color works in your space and how it will look with your backsplash and appliances, so you can be confident that you’re happy with the results before committing to a full application.

Reputable cabinet painting companies will carry liability and workman’s compensation insurance, as well as provide warranties on their workmanship. This is an excellent way to guarantee you are hiring a qualified and experienced professional.

Stain

Unlike paint, stain seeps into wood’s grain and enhances its natural beauty. It also helps hide dirt, fingerprints and minor wear, which can help your cabinets stay looking new for a longer time.

Stain tends to cost less than paint, though customized options can add up. It’s a good option if you’re remodeling a rental property or don’t want to spend a fortune on new cabinets.

To get the best results from your stain, it’s important to choose the right color and type of stain. It’s a good idea to purchase a sample or consult with a professional. They can help you select a finish that complements your home’s decor and highlights the unique characteristics of your cabinetry.

Another benefit of stain is that it’s easier to touch up than paint. Touch-up markers are available at most big box stores, and even if there isn’t an exact match, there’s likely to be a shade that closely resembles your cabinetry’s stain. This can save you a lot of time and money down the road.

Generally, you need to sand down your existing cabinets before applying a stain. This can be a messy and time-consuming process, but it’s necessary to remove the old finish and make the cabinets ready for the staining process. If you’re doing this yourself, be sure to take proper precautions by using drop cloths or plastic sheets to protect your floors and countertops from stains and scratches.

Keep in mind that stain won’t work on all materials, such as thermofoil or laminate doors. If your cabinets are made of Thermofoil or laminate, refinishing isn’t an option for you. If your cabinets are made of real wood or medium-density fiberboard (MDF), then stain is a great option. MDF and wood are both porous, so they can absorb both paint and stain. However, it’s important to note that MDF and wood differ in durability, with MDF being more prone to scratching than wood. To avoid this, it’s a good idea to use a protective sealant over your stain. MDF can also warp if it comes into contact with water.

Glaze

Cabinet glazing is a way to add a second color into your cabinet finish. It’s done by adding a darker glaze to the top of your base coat and then wiping it into the grooves and details on your cabinets. This accentuates those areas and gives your finished project a more lived-in look.

Before applying your glaze, make sure that the cabinets are clean and free of dirt and dust. You’ll want to use a degreasing cleaner and wipe down the surfaces. This will help to remove any grease that might have built up on the wooden surface inside your cabinets and prevent a musty odor from developing.

After the doors and drawers have been cleaned, you’ll need to allow them to dry. This can take a few days, so you’ll need to be patient. Once they’re completely dry, you can reattach the doors and drawers to their tracks. Remember to use the numbered labels that you used to mark them. This will ensure that you don’t get your pieces mixed up when it comes time to reattach the hardware.

Once the cabinets have been glazed and dried, you can start to reattach the hardware and finish up any other finishing touches. This is also a good time to apply a final coat of clear sealer to protect your work. This is especially important if you are going to hang the cabinets in a humid environment, like a bathroom.

Refinishing your cabinets is a great way to improve the aesthetics of your home without spending a fortune. However, you should always consider the longevity of your work and whether or not it makes sense to spend the money on a full cabinet replacement. If you’re looking to upgrade your cabinets with modern features like soft-close hinges or under-cabinet lighting, a complete cabinet refacing might be the best option for you. Contact a professional contractor to find out more about your options. They can offer you a quote for the cost of a cabinet refacing or replacement project that will fit into your budget and lifestyle.

Finishing Touches

As a final step, apply a varnish to protect your work and add an extra layer of depth to the finish. This will also help the cabinets to resist water damage. You can choose between oil-based and water-based varnishes; be sure to follow the manufacturer’s instructions for best results.

Cabinet refinishing is a great way to give your kitchen or bathroom a whole new look at a fraction of the cost and hassle of replacing them. By carefully selecting your paint color, stain color and gloss level, you can create a custom look that matches your existing home decor. This is a great option for homeowners who have already invested in modern upgrades such as soft-close hinges or under-cabinet lighting and don’t want to pay for a full replacement.

The biggest benefit of refinishing is the improved aesthetics. The fresh new coat of paint or stain will instantly make your cabinetry look brand-new, and may even increase the value of your home. The process is also much faster than replacing, so you’ll be back in your kitchen in less time.

Before you begin the painting process:

  1. Prep the cabinets by removing all doors and drawers, labeling them for position, and covering appliances with tarps or drop cloths secured with tape.
  2. Lightly sand the surface to prepare for paint, and be sure to use a higher grit sandpaper than you’d normally use on furniture to ensure smoothness and promote adhesion.
  3. Use quality paint and a good primer, as well as proper brushing techniques.

You should use thinner brushes for better control over short strokes and allow enough drying time between coats to avoid rushing the project.

Once the paint is fully dry, you can reattach the doors and drawers to their hardware. This should be a simple task as long as you numbered each piece and kept the hardware organized. You can also consider replacing the hardware completely to give your cabinets a high-end designer look.

It’s important to note that refinishing does not fix major structural damage or upgrade features such as soft-close hinges. It is also important to assess the longevity of your current cabinets compared to those you would like to replace them with. You’ll need to weigh the pros and cons of both options to decide which is right for you.

Plumbing

What Does a Plumber Do?

Plumber Shreveport are responsible for installing, repairing and maintaining the pipes and fixtures that facilitate water and gas distribution in residential and commercial settings. They work from blueprints and follow building codes to ensure the integrity of the plumbing infrastructure.

A career as a plumber requires physical stamina and strength, manual dexterity and the ability to identify and resolve problems. There are several routes to becoming a licensed plumber, including earning a trade school certificate and entering a formal apprenticeship under a journeyman plumber.

Whether in residential or commercial settings, plumbing systems deliver water, remove waste, and regulate indoor climate through a complex network of pipes, valves, and fixtures. A plumber’s job is to install, repair, and maintain these systems to ensure they function properly. They must also have a thorough understanding of plumbing principles and be proficient in a variety of tools.

Home plumbing systems consist of two separate yet interconnected pipes: supply lines and drainage pipes. Supply lines bring in clean, fresh water from outside while drainage pipes transport soiled, wastewater away from inside homes and buildings. Plumbers use a variety of specialized tools to inspect, maintain, and repair these systems.

When a homeowner has a plumbing problem, it’s usually due to a clogged drain or leaky faucet. While some clogs are easy to fix with DIY techniques, others require the expertise of a trained professional. Plumbers understand how to diagnose and solve these problems quickly and efficiently.

The plumbing system in your home is more complex than you might think. There are dozens of pipes carrying fresh, clean water to your sinks, showers, and toilets. And the wastewater from those fixtures heads back to the sewer system through a series of downward-angled drains and vents. In addition, the water supply system must contend with pressure issues and the laws of gravity to make sure all water flows where it should.

While most homeowners rely on plumbers for major plumbing repairs, many are unaware that these professionals also specialize in installation and maintenance. As a result, they can install new components or entire systems for renovation projects. For example, plumbers may be called to replace old piping that’s worn out or install new water heaters and dishwashers for an upcoming kitchen remodel.

Some plumbers work on larger scale construction sites, installing plumbing for office buildings, hospitals, hotels, and other large facilities. These projects typically involve working with a team of construction tradespeople to lay out piping systems according to blueprints and connect them to existing water supply and waste disposal systems. This type of work requires a high level of skill and knowledge of building codes, regulations, and safety procedures.

The plumbing systems in commercial and industrial buildings are usually larger than those in residential structures. This means that there is more water and more equipment to install, maintain and repair. Commercial and industrial building designers often consult with plumbing engineers to create comprehensive systems that are safe and efficient. Plumbing engineers have the skills and training to design plumbing systems that meet local building codes and standards. They also understand how to work with the different types of materials that are used in plumbing.

Plumbers typically work on construction sites, installing the plumbing system according to the architect’s plans. They may work alongside other tradespeople like carpenters and electricians, laying out pipe sections, installing fixtures and appliances, and connecting the plumbing to the water supply and drainage systems. Some plumbers specialize in new construction, while others focus on maintaining and repairing existing systems.

Many plumbing professionals work independently, choosing to freelance or run their own small businesses. This allows them to have greater control over their work schedules and the projects that they take on. It can also be more lucrative, as independent plumbers are generally paid a higher hourly rate than those who work for large companies.

Plumbing workers sometimes face hazardous situations on the job, especially when repairing sewer systems. Human waste contains dangerous microbes that can cause illnesses in people who come into contact with it. These include cholera, typhoid and hepatitis. Plumbers should always take precautions when working with sewage and should wear protective clothing to minimize their exposure.

A high school diploma is typically the minimum educational requirement for becoming a plumber. However, many plumbers pursue additional education to gain the necessary skills and knowledge for their careers. They may attend a vocational program at a community college or trade school. These programs usually offer hands-on training and classroom instruction in topics like plumbing theory, reading blueprints, local plumbing codes and regulations, and safety practices. Some plumbers also choose to complete an apprenticeship program. This is a great way to learn the trade while earning a steady income and gaining valuable work experience.

As a licensed plumber, you can work for a plumbing company as an employee or operate your own business independently. The trade offers excellent job security as people will always need plumbers to fix their leaky toilets and broken showerheads. This career also provides ample opportunities for advancement. If you’re interested in becoming a master plumber, start by familiarizing yourself with the construction codes and regulations that govern this occupation. This will help you prepare for the licensing exam and pass it on your first attempt.

Residential buildings are where most plumbing issues occur, especially in apartment complexes where multiple tenants share the same plumbing system. As such, they require more regular maintenance to ensure the plumbing and water systems are functioning properly. Residential plumbers are trained to provide fast, reliable service to address any issues promptly. This is important, particularly in emergency situations when the plumbing may be overflowing or flooded due to severe weather conditions.

Local plumbers understand the unique challenges that can arise with local plumbing systems and are well-acquainted with the climate that affects pipes in different regions. This knowledge can help them resolve problems quickly and prevent further damage to the property. For example, a plumber can use specialized pipe inspection cameras to detect blockages and identify the best course of action without the need for expensive excavations.

As the world shifts towards greater environmental sustainability, plumbers are an essential part of shaping eco-friendly construction practices. Through their expertise in installing and maintaining efficient water-saving fixtures, smart irrigation systems, greywater recycling, and energy-efficient heating solutions, plumbers contribute to reduced utility bills, increased cost savings, and lowered environmental impact.

Plumbers also play a critical role in educating customers on water-efficient practices, such as repairing leaky faucets and minimizing water wastage. This is crucial to addressing water scarcity and promoting sustainability, as well as minimizing costs and long-term waste.

The variety of duties and responsibilities that come with being a plumber make it an exciting and rewarding career. From working with a wide range of clients to solving unique and challenging problems, this is an ideal occupation for individuals who enjoy mental challenges. Additionally, working as a plumber can lead to excellent pay and benefits.

Plumbers must be licensed to practice their trade, and licensing requirements vary by state and city. To become a licensed plumber, you typically need to complete an apprenticeship and have several years of on-the-job experience. You also must pass a state certification exam. Some states allow you to substitute directly related academic training for some of the work experience required.

Apprenticeships are a great way to learn the plumbing trade while earning an income. They typically last four to five years and combine classroom instruction with hands-on training. During an apprenticeship, you will work alongside experienced plumbers and learn the skills necessary to complete various types of plumbing projects. Many apprenticeship programs offer financial benefits, including tuition reimbursement and housing.

After completing an apprenticeship, you can apply to become a licensed journeyman plumber. To qualify for this position, you must have completed an apprenticeship program and had at least four years of on-the-job experience under a master plumber. Three of those years must have been spent working in a supervisory capacity. You must also have passed a state certification exam.

If you want to be a master plumber, you need at least seven years of experience in the planning, design, installation and repair of plumbing systems. Two of those years must have been spent as a Department of Buildings-registered journeyman plumber. To obtain a master plumber license, you must have passed a written and practical exam. In addition, New York requires you to submit to a background investigation.

In addition to having the appropriate licenses and work experience, plumbers must have good customer service skills to deal with their clients. They often interact with customers face-to-face and must be able to explain complex plumbing issues in an easy-to-understand manner. Plumbers also must be able to provide accurate estimates and ensure that their work meets local plumbing codes.

Some plumbers prefer to work as independent contractors rather than employees of a company. This type of career offers a number of advantages, including flexible scheduling and the ability to choose which jobs you want to accept. However, it is important to understand the risks involved in this type of career, including exposure to chemicals and sewage and the physical demands of the job. In addition, being an independent contractor can make it difficult to get insurance coverage, and you may be responsible for paying your own taxes.

Home Improvement

The Benefits of Exterior Painting

Paint is more than just a color; it offers more subtle benefits for your home than you may think. It can help protect the siding from rot, mold, insect and rodent infestation, and dampness.

Painters Wilmington DE can revitalize your house and make it look brand new. However, proper preparation is essential for a high-quality paint job.

Your home’s curb appeal is critical to its value, as it provides a first impression to guests and potential buyers. A fresh coat of paint can make a significant difference in the way your home looks, and it also protects the exterior from damage caused by rain, wind, sun, and other weather conditions. When your home has good curb appeal, it is much more likely to sell quickly and at a higher price.

Curb appeal is a term used to describe the overall appearance of a house from the street, including the front yard landscaping, the type and color of house siding, and other decorative elements. Adding curb appeal to your home can be as simple as making small improvements, such as painting your porch or replacing the house number on the front door. You can also add more decorative features, such as a new planter or a herringbone pattern walkway. The curb appeal of your home can be increased with a professional paint job, and your local painting contractors can help you choose the right colors for your home.

While you may have a unique architectural style, exterior painting companies can provide ideas for improving your home’s curb appeal that can be applied to any home. For example, using contrasting colors to highlight certain parts of your home’s exterior can show off its lines and enhance its architectural details. Many exterior painting contractors can even use their knowledge of the local environment to recommend the best color and finish options for your home.

Another way to increase your curb appeal is by enhancing your front yard with an attractive and colorful garden. The color, shape, and size of the plants you choose can make a big impact on how your yard looks. Make sure to plant flowers and shrubs that bloom throughout the seasons for a continuous supply of beauty.

A final way to boost your curb appeal is by sprucing up the front entrance to your home. This can be done by adding a welcoming touch, such as a fresh-smelling wreath or brightly colored flower pots. You can also add a doormat and welcome mat to help your guest feel at home as they enter.

Durability is a key element of any painting project, but it is especially important for exteriors. This is because the paint on exterior surfaces is subject to a variety of weather conditions that can cause damage and degradation over time.

Humidity, UV radiation, temperature fluctuations, rain and snow can all take a toll on the surface of the building and the paint that covers it. The right paints can help combat these factors, protecting the structure and improving its lifespan.

The best way to ensure that your paint job lasts as long as possible is to hire a professional. A reputable painter can provide the proper preparation and application methods necessary for a durable finish that will stand up to years of outdoor wear and tear. They can also advise you on the best color choices to maximize durability.

While it may seem counterintuitive, lighter paint colors are often more durable than darker shades. Darker paints absorb more UV rays, which can break down the pigment and fade the paint color over time. Lighter paints, on the other hand, reflect more of the sun’s rays and protect the surface from discoloration.

Another way to increase the durability of your exterior painting project is to choose a latex-based paint that is formulated for use outdoors. This type of paint is less likely to crack and peel over time, which can lead to costly repairs. Additionally, latex-based paints typically emit fewer volatile organic compounds (VOCs) than oil-based alternatives. VOCs are hazardous to your health, so it’s important to limit your exposure to them.

One last tip for maximizing the durability of your exterior paint job is to allow sufficient curing time. The length of time that it takes for your new coat of paint to fully cure depends on the weather conditions and temperature at the time of application. It’s best to paint in warm, dry weather to avoid the risk of premature chipping and peeling.

The longevity of your exterior painting project is largely dependent on how well it is prepared and the quality of the materials used. The right preparation process, a high-quality primer and paint, and a bright, well-chosen color can all contribute to a long-lasting, durable finish.

Your home’s exterior is the first thing guests and passersby notice, so it’s important that it looks inviting. A fresh coat of paint not only enhances the appearance of your house, but it can also increase its value. However, it’s important to choose the right color and style for your house. Not only does this reflect your personal taste, but it can help attract potential buyers down the line if you decide to sell your house.

During the painting process, it’s essential to use high-quality paint in order to get the best results. Cheaper paints will produce lackluster results and deteriorate over time. By contrast, quality paint will last for years and improve the overall look of your house.

Another reason to invest in a high-quality paint is that it will protect your house from harsh weather elements. Rain, snow, and sunlight can all damage your home’s exterior over time. A fresh coat of paint will provide a protective barrier against these elements and help keep your home looking new and attractive.

Exterior painting can also help to improve the structural integrity of your house. By repairing any cracks or gaps in the structure before applying a new coat of paint, you can extend the life of your home and avoid costly repairs down the road.

If you’re considering painting your home’s exterior, it’s important to consult a professional in order to ensure that the job is done correctly. A professional will be able to recommend the best paint for your needs, as well as advise you on the best way to prepare the surface for painting.

There are several different types of paint available for various purposes, including interior and exterior. Exterior paint is designed to withstand the elements, so it’s formulated to be more resistant to moisture and dirt than interior paint. It’s also typically thicker than interior paint, which helps to prevent moisture from seeping through the walls. In addition to these benefits, exterior paint can also be used to add texture to the surfaces of your home. You can choose from a variety of textures, including matte, satin and gloss.

In addition to enhancing curb appeal, a fresh coat of paint serves as a protective barrier against natural damage. It can prevent moisture from seeping into wood and causing rot, protect against sun exposure that can cause fading over time, and keep pests away from your home. The best way to keep your exterior paint in good condition is by identifying areas that may require touch ups and arranging to have them repainted promptly. A professional painting company has the equipment and experience to help you prolong the lifespan of your current paint job.

Inspecting your house regularly is also important for catching any issues before they can become major problems. This will allow you to maintain your home’s exterior without the need for costly repairs or replacements.

During your regular inspections, look for areas of wear and tear that may need to be touched up. Keeping up with this can prevent the need to repaint your whole home and save you money in the long run. Aside from addressing problem areas, it’s also a good idea to periodically wash your home with a mild soap solution to remove dirt and debris that can cause damage. If you live in a coastal area it may be necessary to clean more frequently to prevent the buildup of salt which can cause rusting and other issues.

A new coat of paint can make your home stand out in the neighborhood and attract potential buyers. This can increase your property value significantly, particularly if you are considering selling your house in the future.

While there are many benefits to having your house painted, it’s important to work with a professional contractor who can ensure the job is done correctly and safely. A professional painting company will have the proper equipment to handle any size of job, has experience in working with your type of siding, and can recommend additional services such as gutter cleaning and pressure washing to help extend the life of your new paint job. By following these tips, you can get the most out of your investment and enjoy a beautiful and well-maintained home for years to come.

Cleaning Services

Why You Should Consider Insulation Removal

Replacing old insulation can improve your home’s energy efficiency. It can also reduce airborne contaminants that affect your health.

Before considering insulation removal, you should weigh the pros and cons carefully. A combination of air sealing and new insulation is a better solution. Then you should decide how to proceed. Contact Insulation Removal Perth now!

When insulating materials get old and worn out, they can lose their moisture resistance, fire retardant properties or anti-pest capabilities. Insulation may also become infested with mold, rodent droppings and urine or contaminated by chemicals used to treat wood products. Often, these contaminants can be found in older cellulose and vermiculite insulation as well as in asbestos.

If you are removing asbestos or vermiculite insulation, it is highly recommended that you hire a professional. This is because you will be dealing with a hazardous material that is known to cause cancer with even limited exposure. Attempting to remove these materials without the proper training and equipment can result in serious health risks for yourself, your employees or your customers as well as costly project delays and additional expenses.

Another common hazard found in many buildings is lead dust, which can be created when building materials coated with lead paint are disturbed during a renovation or demolition. This typically happens when the paint is dry scraped, dry sanded or heated during construction or remodeling projects. Lead dust can be extremely dangerous to human beings and poses a health hazard when inhaled, especially for children or pregnant women.

Asbestos and other insulation materials contain irritant fibers that can cause various illnesses and conditions when inhaled. These irritant fibers are released when the material is disturbed during removal, which can be done either by hand or by using a machine. The machine can be more effective, but it is important that the correct safety equipment is used, including a respirator or mask.

Other common irritants and pollutants found in insulation are mineral wool, urea formaldehyde foam and polychlorinated biphenyls (PCB). These materials can be found in both newer and older buildings, and can cause irritation to the eyes, skin and lungs when inhaled or touched.

If you are planning to renovate or remodel your home, a professional attic insulation removal can be an excellent way to make the space safe for you and your family again. A qualified crew will use specialized equipment and disposal methods to safely remove insulation, preparing the area for re-installation.

The attic is a prime location for mold, rodents and other pests to enter your home and damage the insulation. They nest and contaminate it with urine, droppings, and other waste, which causes the insulation to degrade or even cause structural damage. This is why contaminated insulation needs to be removed and decontaminated before installing new materials.

If you hear scurrying or scratching in your attic, this is a sign of rodent activity that should be addressed immediately. Rodents can chew or gnaw through wires and other components, causing a dangerous electrical hazard. Rodents also leave behind bacteria that can make you sick and lead to respiratory issues. If you have family members with allergies or breathing difficulties, this is an especially important reason to get rid of the old insulation.

In addition to reducing allergens and health risks, cleaning the existing insulation can save you energy costs. When your attic is well-insulated, your furnace and air conditioner don’t have to work as hard to maintain comfortable temperatures throughout the house. This can significantly lower your monthly energy bills, particularly in Phoenix.

During the insulation removal process, professionals monitor air quality to ensure that contaminants don’t become airborne. This helps to keep you and your family healthy, and it prevents the spread of any harmful elements to other parts of your home.

The insulation is then transported to facilities that handle hazardous materials, where it’s disposed of in accordance with state and local regulations. This prevents environmental contamination and ensures the safety of the community, as well as your neighbors.

To safely remove contaminated insulation, experts prepare the attic area by covering any surfaces leading to it with plastic sheeting. They then put on protective equipment and begin the cleanup. If the insulation is blown in, it’s removed through a vacuum system and placed into a special waste bag. If the insulation is batt-type material, it’s rolled up and discarded. Once the contaminated insulation is removed and taken away, the attic can be inspected for any chewed wiring or additional rodent droppings or feces and have any necessary repairs completed before new insulation is installed.

Insulation is a critical component of your home or commercial building’s energy efficiency, but it loses its effectiveness over time through moisture damage. This leads to a loss of thermal energy and increases your energy bills, especially for heating and cooling. By replacing old insulation with new materials, you can reduce your energy consumption and save money.

Insulation removal should be done by a qualified professional to minimize risks and ensure the job is completed properly. During the removal process, professionals will turn off any power connections in the attic and disconnect live wires. This is an important step to prevent electrical shock and fire hazards. It also eliminates the risk of contaminating any electrical systems with dust and debris that could cause a short circuit or fire.

Attics and crawl spaces can contain a variety of things that need to be removed before beginning the insulation removal process, including rodent feces, urine, bird droppings, bat droppings, nesting material, living insects, and mold. Getting rid of these contaminants before installing new insulation allows for better air quality in the building and minimizes health issues such as asthma and allergies.

Once the contaminated insulation is removed, the attic and crawl space can be cleaned and prepped for the installation of new insulation. Professionals will use a special vacuum system to keep the debris contained and prevent it from spreading to other parts of the building. They will also clean and reinstall existing vents and attic hatches as needed.

In addition to saving energy, having your insulation removed and replaced by a professional can lead to significant cost savings for homeowners and property managers. A new layer of high-performance cellulose insulation can significantly cut your heating and cooling costs by keeping heat in during the winter and out in the summer. This is important because up to 50% of energy in the average American house is used for heating and cooling. Insulation removal and replacement can make a significant difference in energy savings, especially for older homes or those with poor or damaged insulation.

Whether your insulation has become damaged by rodent infestations, mold outbreaks, or simply age and wear, it may need to be removed for health reasons. Older materials, such as asbestos and older fiberglass products, are often hazardous, and the insulation removal process can expose homeowners to them. Additionally, improper removal of insulation can cause damage to structural components and leave behind dangerous contaminants that could pose an additional health risk.

Getting rid of old insulation is a challenging DIY project, and it’s not recommended for anyone without experience. Prioritizing safety during this process will ensure that it goes smoothly and efficiently and that you’re able to get your home back in working order. This involves wearing the proper protective gear and preparing the space to be worked on before starting. This includes covering the access point to your attic and sealing off ducts and electrical wires, as well as making sure that you’re working in an area that has good ventilation.

It’s also a good idea to cover any furniture in your attic with plastic sheeting, and make sure that you’re familiar with the removal process for your specific type of insulation. For example, blown-in insulation requires a special vacuum system that can channel the material out through a secure hose and into disposal bags. This will keep it from spreading around your house, which can be especially hazardous for people with existing respiratory or health conditions.

The most important part of this process is ensuring that you have the right equipment and tools to do the job, as well as understanding how to safely work with the various types of insulation. This will help you avoid potentially harmful toxins, save time, and make the process as stress-free as possible.

Home Improvement

How Hardwood Floors Are Made to Last

Whether you are designing a rustic farmhouse or updating your mid-century modern home, there is a hardwood floor to match your style. Hardwood floors come in various textures, grain patterns, and plank widths.

The first step in the hardwood flooring life cycle is raw materials acquisition. Hardwood Floor Refinishing NJ requires a great deal of energy.

Hardwood Floor Refinishing

Hardness is one of the most important factors in determining whether a hardwood flooring material will hold up to everyday wear and tear. Hardwoods with a higher Janka rating (the industry standard for measuring the overall hardness of wood species) are ideal for high-traffic areas and commercial spaces. Those with lower Janka ratings are more suitable for areas that see less foot traffic.

Choosing the right hardwood for your space comes down to your needs and aesthetic preferences. If you have children or pets, a harder wood is the way to go, as it will stand up better to damage from heavy furniture and toys. On the other hand, if your design style leans more toward a natural or rustic look, you may choose softer woods like cherry, maple, or ash.

Other factors to consider include the grain pattern of the wood and its color tones. Grain patterns can range from straight to wavy, and some woods are more colorful than others. For example, hickory is a very popular hardwood choice due to its strong appearance and durability, while oak has a more subtle and traditional look.

When choosing a wood, it’s also important to understand how the type of grain you select can affect the overall look of your floors. For instance, live sawn planks are cut from a tree in perpendicular slices going bottom-to-top, while rotary cut boards are made from logs that have been cut across the grain. In addition, the way that a board is sanded can impact its appearance and how it holds up to normal wear and tear.

The most common type of damage to hardwood is water damage. This can lead to swelling, warping, cracking, and even rot. However, the majority of water damage is easy to fix and usually only requires a simple refinish.

Another common type of damage is sun exposure, which can cause the finish to deteriorate and change color over time. This can be a result of harsh UV rays that penetrate the surface of the wood and create uneven discoloration.

Finally, it’s worth mentioning that if you’re concerned about the environmental impact of your hardwood flooring, engineered options are a good option. They use a portion of the waste and byproducts from other wood manufacturing processes and are much more environmentally friendly than solid wood.

Scratches on wood floors are an inevitable part of owning a home. It can be difficult to remove them completely, but there are a few different ways to fix scratches on hardwood flooring that can make your floor look as good as new.

The first thing to do when trying to repair a scratch on hardwood is to thoroughly clean the area. Start by using a soft brush to sweep up any loose dirt and debris on the surface. Then, use a commercial cleaning product that is safe to be used on wood floors. This should be free of waxes and other substances that would interfere with the process of refinishing your floors later.

Next, wipe down the area to make sure it is completely clean and dry. Try to avoid rubbing the scratched area because this can cause it to become more visible. After the floor is cleaned, sand down the area until it is smooth and then apply some fresh finish. This will cover up the scratch and help it blend in with the rest of the floor.

If you have a deep scratch or gouge on your wood floors, you may need to hire a professional, depending on how extensive the damage is. If you’re not comfortable hiring a pro, however, you can still repair your flooring by following these steps:

First, clean the area of the floor with a damp cloth to make sure it is completely clean and dry. If you want to be especially careful, use a tack cloth that is specially designed not to do any additional damage to your hardwood floors. You can also use a steel wool pad, such as a Brillo, to buff the scratched surface. Make sure to rub in the direction of the grain of the wood rather than against it.

After the scratch has been sanded down, mix up some pre-colored latex wood filler that closely matches your floor’s color. Apply the filler to the damaged area with a plastic putty knife, which is much softer than a metal one and less likely to do any additional damage to your hardwood floors. Once the filler is completely dry, tint it with a stain pen that is also a close match to your floor’s color.

Hardwood flooring can last a lifetime, and it is one of the most durable types of flooring you can have in your home. It can also be repaired easily. However, the type of wood you choose will have a significant impact on how well it holds up to everyday wear and tear. Some wood species are harder than others, and some can stand up to scratches better than other types of hardwood.

There are a number of things you can do to increase the durability of your hardwood floors. Choosing the right wood species is important, but the finish you choose will also have an impact. A polyurethane or oil-based finish will create an extra layer of protection that prevents moisture from penetrating the wood, preserving its durability and making it easier to clean and repair.

You can also add a protective barrier to your floor with a stain. This will not only help protect against moisture, but it will also protect the surface from scratches. Stain color is also an important consideration, as darker stains tend to hide scuff marks and scratches better than lighter stains.

The hardest commercially available hardwoods are Ipe and Jatoba, but these exotic woods are expensive. Domestic oak, maple, hickory, and cherry are among the best options for durability in hardwood flooring. Hickory is especially hard and has a varied grain pattern that helps conceal scratches. Cherry is softer but has a beautiful, rich color and warm hue that makes it a great choice for low-traffic areas in the home.

Preventing damage to your hardwood floors is a big part of maximizing its lifespan, so be sure to place doormats at entrances to trap dirt and grit and encourage family members and guests to remove their shoes before entering. Use furniture pads or felt protectors to prevent scratches on the legs of your furniture, and keep pet nails trimmed to reduce scratching.

Both solid and engineered hardwood are more durable than carpet, but solid wood requires more trees to harvest than its engineered counterpart. If you choose to go with solid wood, be sure that it is sourced from a sustainable supplier and certified by the Forest Stewardship Council. Also, remember that natural wood is vulnerable to moisture, so you should avoid putting it in rooms that are likely to get wet, such as the bathroom or kitchen.

While hardwood floors are considered to be a durable flooring choice, they must be maintained well to ensure they last for a long time. Hardwood floors are prone to damage from spills, excessive sun exposure and pet stains. However, these problems are easily prevented with regular cleaning and proper care.

Sweeping or dusting your floors daily is one of the easiest ways to protect your hardwood from scratches, dents and other common damages. Make sure to use a vacuum with a brush guard, which helps to prevent the rotating bristles from scratching your hardwood floors. If possible, opt for a canister vacuum that has a special floor brush attachment.

Other simple steps to prevent damage to your wood floors include putting door mats or rugs inside and outside your home to catch dirt and debris that can scratch and stain your flooring. Encouraging your family and guests to remove their shoes before entering your home is another way to reduce the amount of dirt that gets tracked onto your wood floors. If you have pets, trimming their nails regularly will help to minimize the amount of scratching they do on your hardwood floors.

Aside from protecting your wood floors from scratches, dents and other common damages, you can also prevent permanent damage by having them professionally refinished every three to five years. This will help to restore your hardwood floors to their original luster and keep them looking new.

If you do notice that your hardwood floor is starting to look dull, avoid using wet-mopping methods on it. Residual water can damage the wood, cause discoloration, and leave a greasy film behind. If necessary, you can use a dry mop or cloth to remove any residue and moisture.

While scuff marks are sometimes unavoidable, you can minimize them by installing furniture pads on the bottom of your chairs and other furniture pieces. These soft pads prevent the feet of your furniture from scratching your hardwood floors, and they are easy to install. Other preventative measures include installing low e-coating on windows to minimize the amount of sun that can cause your hardwood floors to fade or change color quickly.

Cleaning Services

Why Garbage Removal Is Important to Public Health and the Environment

Using rubbish removal services is a great way to reduce waste. It helps protect the environment and public health. Garbage that ends up in landfills produces greenhouse gases. It also pollutes the soil and water. These toxins cause many health problems.

The first step in effective rubbish removal is planning. This will help you decide how much rubbish you have and where it goes. For more information, click the Website to proceed.

The cost of rubbish removal depends on the type and volume of junk that needs to be removed. Larger volumes are more expensive to haul away and require more time to sort, leading to higher rubbish removal prices. However, there are ways to reduce the costs of rubbish removal. One way is to rent a skip bin. This can be a good option for businesses with high volumes of trash, but it is only sometimes the most cost-effective solution.

Another way to save money on rubbish removal is to use a waste management company. These companies provide various services, from recycling to disposing of hazardous waste. They can also offer bulky items and white goods pickups. They can also provide a range of skip sizes, allowing you to dispose of more trash at a lower price.

Rubbish removal companies typically charge a flat fee for each pickup and may include an additional disposal cost. They can also charge an extra fee if the waste is contaminated with chemicals, batteries, or other hazardous materials. These fees are necessary to ensure the safety of workers and avoid harming the environment.

Most local sanitation departments offer programs that help residents get rid of their trash at a low cost, such as designated bulk garbage collection days and community collection events. However, these programs are limited and often only cover some waste types. This is why many people hire a rubbish removal service instead of taking the trash to the dump.

After the rubbish is collected, it is sent to a landfill, incineration plant, or recycling depot. Landfills are the most common destination for rubbish and can cause environmental problems. In addition to filling the earth with toxins, landfills are a major source of methane, a greenhouse gas. Recycling helps to protect the environment by reducing the amount of waste that ends up in landfills.

Some municipalities use a variable rubbish fee system to help their residents cut their trash bills. This is a great option for cities struggling to balance their budgets and want to reduce waste. By establishing a link between the fee level and the service cost, this system allows for better visibility of changes in the garbage bill. In addition, it helps to ensure that garbage user fees are not being used for other purposes.

If rubbish is not disposed of properly, it can significantly impact the environment. This is because it causes pollution that can cause health problems for humans and animals. It also damages natural habitats and can lead to climate change. In addition, it can create an unpleasant odor that can affect the hygiene of nearby inhabitants. The good news is that more and more people are becoming aware of the negative effects of rubbish disposal and are taking action to change their habits.

Everyone produces waste, whether it is a large office, a small business, or a single family. The main goal of rubbish removal is to dispose of this waste responsibly and limit its environmental impact. There are many options available to do this. You can recycle paper, cans, and plastic. You can also use an incinerator to burn your rubbish, which can help reduce landfill waste. Alternatively, you can donate your unwanted items to charity. Finally, you can hire a man with a van ad to remove your rubbish.

The most important thing to remember when disposing rubbish is to keep it out of the water. Sadly, much of the rubbish that is dumped in rivers and oceans ends up polluting the water. This contaminates the water supply and kills fish and other marine life. It also causes soil pollution, as the contents of the rubbish leak into the ground and contaminate it.

Another concern is that rubbish can produce harmful odors and attract pests. It can also produce fires and pose a risk to people’s health. In addition, it can cause respiratory problems and allergic reactions. It can also harm the skin and eyes.

Rubbish removal is a complex process that requires careful handling of different materials and processes. A rubbish removal company should follow a strict set of environmental guidelines and ensure that all waste is disposed of correctly. In addition, they should ensure that all their workers are safe and follow the necessary safety rules.

The proper disposal of rubbish is a critical aspect of public health and safety. When people do not recycle or dispose of their waste properly, it can result in severe environmental and health-related consequences. For example, unsorted rubbish can attract rodents and other pests that spread disease and cause hygiene issues. In addition, the rotting waste can emit unpleasant smells that can affect people’s health. In addition, untreated waste can contaminate water supplies and create an environment that is hazardous to human health.

The improper handling of rubbish can also hurt the local ecosystem and wildlife. For instance, sewage and chemical pollution can destroy natural habitats and pollute the water supply. This can make it difficult for water companies to sanitize drinking water and lead to environmental problems such as coral reef degradation.

It is also important to note that improper waste disposal can lead to significant financial penalties. It is important to follow strict regulations when disposing of rubbish, and you should always consult a professional to ensure that your disposal methods are safe for the environment.

In addition, it is crucial to have a first aid kit during the rubbish removal process. This will help you quickly treat minor injuries, such as cuts and scrapes. The kit should also include items like bandages and antiseptic wipes. Taking regular breaks during the cleaning process is also important, as this will reduce your risk of injury.

If you are a resident, you may need to hire rubbish removal services to keep your home clean and safe. Using a reputable, licensed, and insured service is the best way to do this. This will ensure that the company is compliant with all local and state laws and abide by industry standards. Moreover, hiring a reputable service will save you time and money.

When it comes to rubbish removal, many people assume that it is a simple task. However, the truth is that rubbish removal can be a complex and dangerous process. Whether it is from your garden, garage, or workplace, rubbish can cause damage to the environment and health hazards for you and your family. If you want to protect yourself and your loved ones, then you must follow these rubbish removal tips:

The rubbish we throw away can be toxic to wildlife. It can also pollute water and soil. Chemicals can leach into the groundwater, contaminating drinking water, and plastic can clog water drains, resulting in floods or blocked sewerage systems. Irresponsible waste disposal also poses health risks for rubbish workers and neighboring communities through air pollution, direct contact with hazardous waste, or inhalation of volatile chemicals.

Leaving rubbish around can attract rats, flies, and other pests. These pests can carry diseases like salmonella, leptospirosis, and shigellosis. They can also transfer these diseases to humans. They also leave feces and urine all over the piles of rubbish, and their droppings can be spread on shoes, clothing, and food.

Irresponsible rubbish removal can also cause physical injuries. It can lead to slips and falls due to slick surfaces such as broken bottles, scrap metal, and oily rags. It can also cause wounds from rusty or sharp objects. It can also lead to tetanus when these rusty items are stepped on.

A cluttered rubbish bin can also be a fire risk and could cause an accident or injury. It can block the path of a vehicle or person. It can also be blown by the wind and end up in places where it will sit for days, months, or even decades, leaching contaminants into the groundwater.

Rubbish removal involves a lot of heavy lifting, especially if the rubbish is large or heavy. This can cause serious injuries to waste operatives, especially if they are untrained or need to use the right equipment. It can also be very dangerous for anyone who comes into contact with it, especially children. The best solution is to hire an expert rubbish removal service. They are familiar with the safety procedures and will remove your rubbish safely. This will save you money in the long run and ensure the work is done correctly. It can be expensive to hire professionals, but the peace of mind you will have is worth it.

Water Heater

Tank Water Heater

Water Heater Repair Denver is the most common model powered by electricity or natural gas. When hot water is needed, it enters the tank and rises to the thermostat.

When the thermostat senses a temperature change, the heating mechanism turns on. Then, the water flows from the heat-out pipe to the faucet or appliance.

A tank water heater is a cost-effective option for many homes. It stores water and keeps it hot until needed, so managing a hot-water supply like you might have with an on-demand or gas unit is unnecessary.

A new tank water heater costs about $2,500 to $3,500, including installation costs. The size of the heater and the fuel type are important factors that will impact its final cost.

If you choose a gas model, expect to pay more than an electric model. The installation cost is also impacted by whether you need to install a new natural gas line or special venting.

It’s important to hire a professional to perform the installation. They can assess your home and recommend the best tank water heater. They will also help you decide between a tank or tankless unit. They’ll consider your current water usage and how it might change. They’ll also help you decide on the right capacity for your home based on peak demand. This is the water your household needs at the highest point in an hour, such as when everyone takes a shower or runs the laundry washing machine.

There are four basic types of residential water heaters: tank-type, hybrid, tankless, and point-of-use units. While tank storage units are still the most popular, hybrid and tankless models are growing and offering improved energy efficiency. Point-of-use units deliver hot water to appliances and fixtures far from the main water heater.

Before installing a new water heater, you’ll need to know how much it will cost to replace or repair your existing one. You must consider your family’s size, hot-water usage, and budget. You’ll also want to know how long the new unit will last and if you have hard water in your home. A plumber will be able to give you a better idea of the total cost of your project, including any necessary repairs and replacement parts.

Installing a new tank water heater takes time and effort. It’s important to follow the manufacturer’s instructions and local installation codes and have all the necessary tools. Before beginning, turn off the power and gas supply to the old water heater. It is also a good idea to connect a garden hose to the drain valve and run it outside to allow all the water to drain. Then, remove the water heater access plates and disconnect the water lines. You can use a tubing cutter to cut the gas line. Once the line is disconnected, open the drain and hot water valve at the water heater. Be careful – the water may be very hot!

Once the water is heated, it travels from the tank’s openings to your home’s hot water supply pipes. The water heater usually includes the temperature and pressure relief valve, a heat trap, and a discharge pipe. They can be purchased at your local hardware store if they aren’t. Be sure to wrap the threads of the temperature and pressure relief valve with Teflon tape before screwing it into the tank. You should also add a copper discharge pipe. This pipe should be insulated to protect it from freezing temperatures.

Before connecting the water supply lines, ensure that the voltage, wiring size, and circuit breaker are appropriate for the water heater. In addition, you should replace any exposed copper wire and add a UL-listed or CSA-approved water heater thermocouple.

It is recommended that you use copper pipe fittings with a Teflon seal. If the hoses aren’t sealed properly, they could leak and cause an electrical fire. It is also important to use short plastic-lined nipples to shield them from corrosion from hard water. You should also put a layer of plumber’s tape or pipe joint compound on the ends of each nipple to ensure a secure connection. Once the nipples are in place, you can connect them to the gas line. After re-connecting the gas line, you should test for leaks by turning on a faucet and running soapy water over the connections.

A standard tank storage water heater uses natural gas or electricity to warm the water. It works by heating cold water in pipes and storing it at the expected temperature inside a cylindrical metal storage tank until needed. During this cycle, the hot water system remains active while household members shower, wash laundry, and use other appliances and fixtures. When the demand for hot water exceeds the supply stored in the tank, a gas burner turns on, and the process begins again.

The energy efficiency of a traditional tank storage water heater depends on the type of fuel used, the size of the unit, and the piping that delivers it to end-users. In general, gas-powered units have lower operating costs than electric models. Regardless of fuel source, an ENERGY STAR-certified model offers higher efficiency than conventional tanks.

Electric water heaters with tank-mounted electric resistance elements are among the most efficient models. These systems also tend to be quieter than most other water heaters and use less water than their gas counterparts.

However, electric water heaters can be subject to problems. They can experience short-circuiting or element failure, requiring replacement or repairs. If this happens, a professional should be consulted to ensure your water heater’s safe and efficient operation.

The amount of hot water you use daily determines your water heater’s size. To resolve this, add up the gallons per minute flow rates for all fixtures and appliances in your home. This will give you your peak hour demand, which you can compare to a specific water heater’s first-hour rating (FHR).

If you choose a gas-powered tank water heater, look for a condensing model with an efficiency factor of 0.84 or greater. These models capture waste heat from flue gases and transfer it to incoming cold water for heating, which allows them to achieve significantly higher efficiency ratings than non-condensing gas water heaters.

Depending on the size of your home, you can save even more by choosing a combination appliance that incorporates a tankless water heater for space and water heating. These units are a good choice for homes using natural gas as a primary heating source since they can use the existing gas piping.

The average hot water tank needs to be drained and flushed one time per year to remove the buildup of sediment that can reduce its efficiency and shorten its lifespan. A professional technician can do this for an average of $140. This service may include relighting the pilot light, which can cost an additional $15 or so on average. Occasionally, the anode rod may also need to be replaced, costing an average of $20.

If you’re experiencing discoloration or odors in your water, it’s important to identify the source of the problem. These issues often cause a reaction between the anode rod and sulfur in your water supply. The best way to solve this issue is by replacing the anode rod, but if this doesn’t work, you may need to drain and flush your water heater.

Another common maintenance issue is a tripped breaker or fuse. This is typically an easy fix and will only cost about $20 if you hire someone to reset or replace the breaker or fuse.

In addition to tripped and blown fuses, your gas water heater can have problems with the thermocouple or gas control valve. These are more complicated repairs requiring a professional technician to diagnose and repair the issue.

Gas water heaters can also experience other issues, such as a dip tube that becomes worn out or leaks. The dip tube is a pipe that transfers cool water back to the bottom of the tank to be reheated by the lower element. If the dip tube is leaking, it can mix cool water with hot water and reduce the overall temperature of your water.

Thermocouples and gas control valves can wear out over time and must be repaired or replaced when they go bad. Having one of these parts fail can be very dangerous, so it’s best to let a professional handle the repairs for you. The average cost to have a professional replace the thermocouple or gas control valve is $150 or so, with the thermocouple costing about $20 on average.

Cleaning Services

How to Choose the Right Carpet Cleaners for Your Home

Carpet Cleaners El Dorado Hills CA trap allergens, dust, and bacteria that can trigger health problems. Keeping carpets clean and vacuumed helps improve air quality and reduce allergy and asthma symptoms.

Vacuuming or spot cleaning with household cleaners may not remove all dirt and stains from carpets and rugs. Professionals use powerful machines to inject a mixture of water and cleaning solution, scrub, agitate, and vacuum the mess.

In general, upright carpet cleaners are bigger and more robust than portable models, and they offer greater power and larger tank capacities for deep cleaning entire rooms or large areas. Many also have wider cleaning paths than portable machines, which can help them cover more ground quickly and efficiently. Upright models may also have special attachments and advanced features, such as a built-in water heater that helps keep the cleaning solution hot for better stain-fighting or a dryer setting to speed up dry times.

On the other hand, portable carpet cleaners are much smaller, more lightweight, and designed for spot cleaning and treating individual stains. Most can easily be transported in and out of a vehicle and stored in a closet or small space. Some models can even be charged on the go and will automatically recharge when placed back into the charger, allowing you to work from any room in your home while minimizing the time spent on chores.

Both carpet cleaners have advantages, depending on your cleaning needs and preferences. If your home has heavy-duty carpeting, an upright model with a powerful motor is a good choice for deep cleaning or removing stubborn stains. They can also be pricier and bulkier but often last longer than a comparable portable model.

Various full-size and portable carpet cleaners have been tested in the Good Housekeeping Institute’s Cleaning Lab. Our experts have found that many of the best carpet cleaners feature a water flow technology that delivers just enough clean water to effectively tackle dirt and stains while reducing the amount of dirty water left behind, which can lead to mold and mildew build-up. Most also have a low sound level for quieter operation and a high-powered pump that provides a maximum water vacuum for faster drying times.

The newest and most innovative of the full-size carpet cleaners we have tested is the Tineco Carpet One Smart Carpet Cleaner, which uses an app to adjust the machine’s cleaning parameters according to the type of stain you target. It also offers voice prompts to tell you when it’s time to refill the clean water tank or empty the dirty one and lights that indicate when your carpeting is fully cleaned or needs a refresh.

Carpeting throughout a home creates a warm and cozy atmosphere but can harbor dirt and allergens. Professional carpet cleaning services can sanitize the entire house and extend the life of the fibers. While regular vacuuming will help, a deeper clean is necessary to eliminate stubborn stains and harmful allergens like pet dander. Finding a local cleaner with professional equipment and cost-effective options is vital. Homeowners should ask potential cleaners about their methods, pricing, specialized add-ons, and policies on returning unsatisfactory results.

Many carpet cleaning companies provide a variety of residential and commercial cleaning services. These include wall-to-wall carpet cleaning, rug and upholstery cleaning, carpet repair and restoration, wood furniture cleaning, and antique carpet cleaning. Most of these cleaning companies have online quoting and scheduling processes to simplify the process and make it convenient for homeowners.

A typical carpet cleaning service will involve pre-vacuuming to loosen up any soil in the flooring, followed by deep vacuuming with a high-powered industrial machine. Depending on the type of carpet, the cleaner may use hot or cold water to agitate and lift the debris. They will then use high-velocity air movers to speed up the drying process. Adding a deodorizer and stain preventer after the cleaning is often an additional charge, with prices varying by company and location.

The price of a carpet cleaning service is usually determined by the room size or rug being cleaned. The type of cleaning method, materials used, and the time required to complete the job will also affect the total cost.

Choosing a green carpet cleaning company can save both money and the environment. A green carpet cleaning company will use natural products rather than toxic chemicals contaminating the air and water supplies. These cleaners also support environmental preservation and encourage the recycling of materials.

A carpet cleaning company that uses green techniques will typically offer a wide range of eco-friendly, organic cleaning services. These will include professional carpet cleaning, sanitizing, and deodorizing different rug and carpet types, including wool and conventional synthetic carpeting. They will also use turbo-drying equipment to shorten the drying process, allowing clients to return to their homes faster and avoid the inconvenience of being displaced for hours or days after the carpets are cleaned.

The warranties with your carpet will often require you to have it professionally cleaned regularly. This can be costly, but it will help to protect your investment and extend the life of your carpet. Keeping up with these requirements will also maintain the validity of your carpet warranty, so it is important to save your cleaning receipts and follow the manufacturer’s guidelines.

Many of the most common complaints involving carpets are related to improper care and maintenance. Staining and soiling often cause these issues, but they can be prevented with proper carpet cleaning techniques. Different liquids and stains require various cleaning approaches, so it is crucial to know what type of stain you are dealing with before cleaning it up.

Most carpet manufacturers recommend having your carpet professionally cleaned every 12-18 months. The exact frequency of professional cleaning depends on traffic levels, family size, and soil conditions adjacent to the home. You should avoid using home steamer machines (with bonnet or rotary heads) to clean your carpets, as these may damage the surface pile and void any wear, texture, or quality warranties.

Vacuuming your carpet regularly will also help to keep it in good condition and prevent matting and crushing. The best way to clean is by using a rotating brush attachment and reviewing each area at least twice weekly, ensuring you get into corners and hard-to-reach areas.

If you have a problem with your carpet, it is important to notify the flooring retailer and the manufacturer as soon as possible. You will usually need to provide proof of purchase, a copy of your warranty, and cleaning receipts to file a claim.

Some carpet manufacturers offer a fade warranty, which covers the loss of color in your carpet due to sunlight or other environmental factors. Fading is a natural process that can be reduced by regularly vacuuming and by having your carpets professionally cleaned. It is also important to remember that not all fade warranties are created equal. Some will cover only the cost of the replacement material, while others will also include labor costs.

If you have a pet, choose a carpet cleaner with special formulas for cleaning up those inevitable pet stains. These cleaners break down the odor-causing proteins and help remove them from your carpet without damaging the fibers.

Vacuuming regularly is also a great preventative measure. Be sure to use a vacuum with high suction power to suck up the dirt and debris hiding deep in your carpet. Aim to vacuum at least once weekly and more often in high-traffic areas. Vacuuming removes surface dirt, disperses microscopic allergens, and helps the carpet dry faster after cleaning.

The agitation process pros use is critical to getting all the cleaning chemicals into the nooks and crannies of your carpet fibers. They will either groom the carpet with a rake for deep-pile carpets or use a machine with rotating brushes for more dense rugs. The agitation and heat of the extraction and rinsing processes accelerate the chemical reactions that clean the carpet.

Once the cleaning is complete, allow your carpet to dry completely before rearranging furniture. Open a few windows to promote airflow and speed up the drying process. Be sure to turn on any ceiling fans to help the process.

Having your carpet professionally cleaned is one of the best ways to extend its lifespan and keep it looking beautiful. Follow the above recommendations and call your local professional for more information about proper care. They can guide you through the process and answer any questions. They can even recommend a carpet protector or deodorizer that will help keep your carpets looking their best between cleanings. Be sure to ask about these options when getting a free estimate for your cleaning.

Cleaning Services

How Carpet Cleaners Help Removing Dirt and Grime

Carpet Cleaning Rogers AR use water, detergent, and suction to remove dirt and grime from your carpets. They also offer stain pretreatment and heated drying options.

Professionals will declutter rooms and move furniture to ensure all areas are cleaned. They will also recommend the best cleaning solutions and provide tips on extending the life of your carpet.

Your carpets hold a lot of dirt, much of which you can’t see. It is tracked in on shoes, the feet and fur of pets, and even from the air through open windows and doors. It is abrasive, which causes the fibers to wear down over time. And it can cause odors and even promote the growth of bacteria and other unwanted microbes.

Regular vacuuming helps remove surface dirt, but more is needed. It also doesn’t reach the dirt trapped deep in the fibers. That includes pet hair, lint, food particles, and dead skin flakes. These can affect the appearance of your carpet and can also be a health hazard for family members with allergies or asthma.

Professional cleaning removes the deeper ingrained debris and extends the life of your carpet. It’s also the best way to deal with tough stains.

Before cleaning, it’s a good idea to loosen the ground-up dirt with a vacuum or brush. This step is especially important if you’ve had problems with staining. Then, put a few drops of your favorite cleaning solution in a bucket and mix it with water. A small amount of dish detergent can also help if you want to be particularly thorough. Once you’ve mixed your cleaning solution, apply it to the stains in the affected area and let it sit for about an hour.

After that, scrub the spot with a brush or rag you don’t mind getting dirty. Be smooth, or you may damage the fibers of your carpet. Once you’ve finished, change your bucket to fresh water and use a clean towel to wipe any excess moisture.

To keep your carpets looking and smelling their best, vacuum frequently, especially in high-traffic areas. It’s recommended to vacuum each rug or carpet in your home at least once a week. And remember to change out your vacuum cleaner bag regularly. A clogged bag reduces its effectiveness and can leave your carpet with a dusty, dull, or unpleasant odor.

Pets are a wonderful addition to the family, but they also bring some messes and smells. Many odors soak into the carpet backing and padding, which can be a challenge to remove completely. This is one of the reasons that it’s important to use a carpet cleaner with special tools and features designed for pet stains and odor removal. These cleaners typically feature higher agitation, which helps break up the stains and scents. It has an extra brush tool for treating hard-to-remove pet stains and a nozzle cleaning tool to keep the brush head clean.

Homemade cleaning solutions can also be effective in removing pet stains and odors. Vinegar and baking soda can help break down protein stains such as blood and urine, while dishwashing detergents and hydrogen peroxide can deodorize carpets. Before using any homemade cleaning solution, it’s a good idea to test it on an inconspicuous spot of your carpet to ensure that it is safe for your floors and does not cause colorfastness issues.

Professionals can also address hidden pet stains and odors by identifying them with the help of a blacklight and then using a carpet rake to dislodge any dirt, debris, or pet hair trapped in the fibers. A carpet rake combs through the carpet with stiff nylon bristles, loosening the solid particles and making it easier for vacuuming or an enzyme spotter to tackle the mess.

When it comes to preventing pet stains, regular grooming and providing pets with beds to lounge in can cut down on the amount of dirt that gets tracked into the carpet. In addition, a little bit of training can teach your pets to go outside or into their litter box for bathroom needs rather than on the floor.

When choosing a carpet cleaner, look for one with large or at least two separate water tanks to reduce the time you need to refill the machine. This will save you money and make the product more convenient since you won’t have to stop working to get more water or cleaner. Our top picks all have two water tanks, including the Bissell ProHeat 2X Revolution.

Many things, including pet dander, mold, and dust mite feces, can trigger allergies. These allergens can be found in almost every home and are a major cause of respiratory problems for those who suffer from allergies. Keeping your carpets clean is the best way to eliminate these allergens from the home, which can help alleviate allergy symptoms.

Allergy sufferers should ensure their carpets are cleaned regularly by hiring a professional or doing it themselves. Vacuuming and spot cleaning will help remove these allergens from the home, which will help to reduce the frequency of allergy symptoms. This is also important for those with asthma, as the more allergens in the air, the worse the symptoms can be.

A professional carpet cleaner will use special techniques to ensure the carpet is cleaned thoroughly, eliminating any hidden dirt or debris that may be causing allergies. They will also use special cleaning products that are specially formulated to be safe for people with allergies. These chemicals penetrate the carpet fibers and loosen any dirt or debris, improving the carpet’s quality and removing all allergens.

Having your carpets cleaned regularly will also help eliminate mold or mildew growing in the home. These substances can be very dangerous for those who suffer from allergies and asthma, which is why it is important to have them removed as soon as possible. A good carpet cleaning service will be able to identify and treat these issues, improving the home’s overall health.

Preventative measures can be taken to minimize the need for frequent carpet cleaning services, such as keeping your pets brushed regularly and bathed often. Shedding pets will still produce some allergens, but if they are kept clean and their hair is removed frequently, it can reduce the number of allergy symptoms in the home.

Most carpet manufacturers recommend hot water extraction cleaning as the best method for removing soil deposits and stains. This process involves spraying the carpet with a cleaning solution, which breaks down the soil deposits. Then, the carpet is rinsed with pressurized hot water that dissolves the cleaning solution and removes the soil. The Environmental Protection Agency and the Institute of Inspection, Cleaning, and Restoration Certification recommend this method.

The cost of carpet cleaning varies depending on the type and extent of the job. Professionals typically charge by the square foot or a flat rate per room. They also have access to tools you can’t rent at your local hardware store, including UV lights for stains and high-powered vacuum cleaners. These tools help them remove stubborn dirt that can’t be removed with regular vacuuming. They may also offer special services, such as odor or stain removal. The price for these services can be significantly higher than a standard cleaning.

The most popular carpet cleaning method is hot water extraction, also called steam cleaning. This process starts by pre-conditioning the carpet with a cleaning solution. It then rinses the carpet with a pressurized stream of hot water and moves the dirt into a waste tank. The cleaners use a powerful wet vacuum to remove the steam, dirt, and cleaning solution from the carpet. This method is ideal for synthetic carpets, which dry quickly after cleaning. It’s not recommended for cotton or wool carpets, which can take up to 12 hours to dry.

Another option is carbonated cleaning, which uses tiny bubbles to break down dirt and move it up the fibers. This method is less expensive than steam cleaning but can be risky for delicate fabrics. Dry cleaning, or low moisture cleaning, is another alternative. It costs around $25 to $85 per room and involves a motorized spinning pad covered in cleaning solution. It effectively removes dirt from the top layer of your carpet, but it won’t get to the deep-rooted soils.

Stain removal can cost up to $300, depending on the severity of the stain and its location in your carpet. Food-related stains are easier to remove than pet-related stains, which sink deeper into the pile. If a stain has soaked through the padding and reached the floorboards, pulling it can be much more difficult.

When requesting a quote for carpet cleaning, it’s important to know whether the company will move your furniture. Some companies are willing to move small pieces of furniture for free, while others will charge extra. Discussing this issue before scheduling your cleaning is best, as it can save you time and money.